Seed Saving
by Mhairi McFarlane
What Happens After Flowers?
Have you ever thought about what happens after the pretty flowers fade and wither? The next important biological process is just starting – seed production! If a flower has been pollinated, seeds will develop. Some species produce a tasty berry to house the seed, tempting a bird or animal to eat it and take the seed somewhere else for it to germinate and grow. Other plants make seeds which stick easily to fur, or get blown in the wind – all ways plants disperse themselves.

The Seed Pantry
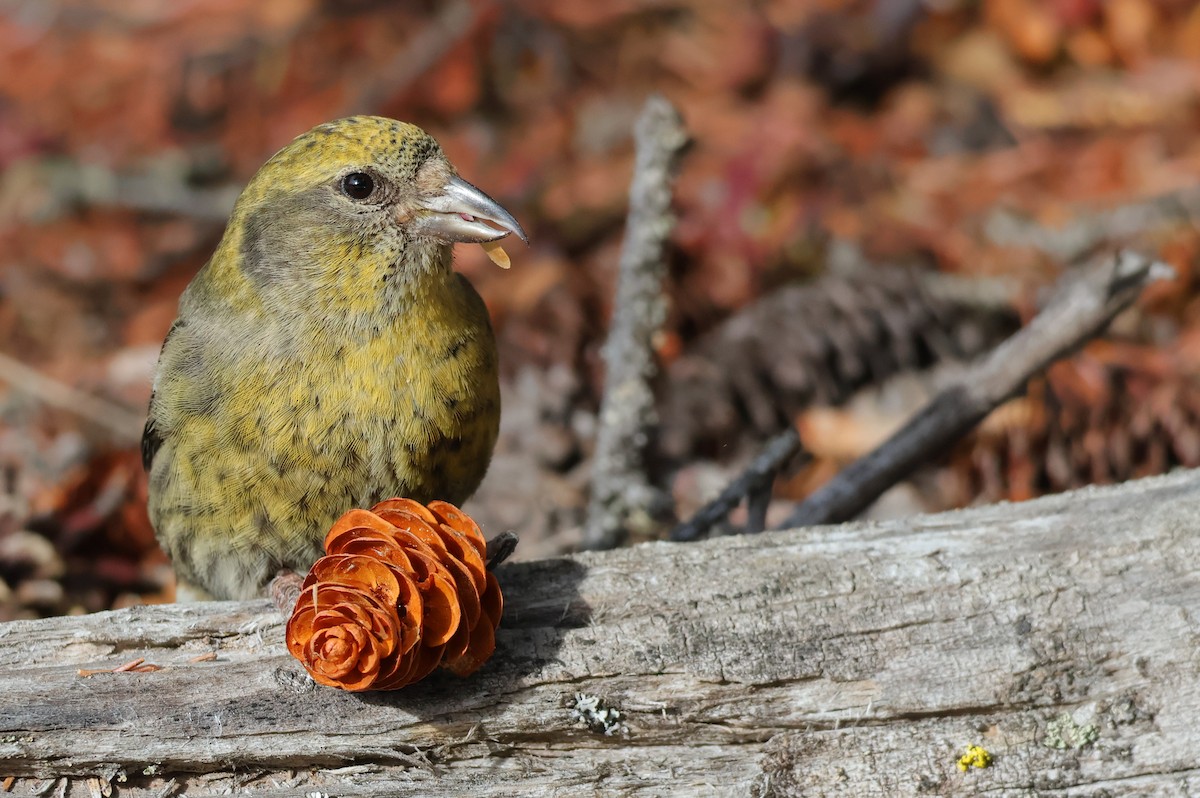
Seeds are an important food source for birds and animals – finches and sparrows have strong beaks to crush hard seeds. Crossbills have taken this a step further and have crossed mandibles to allow them to prise open conifer cones to extract the tasty seeds. Leaving your native plant seedheads and associated leaflitter will help sustain birds during the fall and spring migrations, and through the winter depending on your latitude. Seedheads can be beautiful too, and provide lots of winter interest in your garden.
A Plant Factory!
Another reason to “Leaf it!” is those native seeds can grow into more beautiful plants! You can leave them in place to do so, but if you want to produce more native plants to plant elsewhere in your garden or to give to friends, you might want to try your hand at seed saving and sowing. This can be a bit tricky, and requires some patience and time, but it can also be incredibly rewarding.
Collect Seeds
If you have a few native plants growing in your garden, and want to produce more, think about collecting some seeds! Watch the flowers carefully. As they wither, the petals will change colour, turn brown and fall off. A fruit, pod or some sort of seed casing will form. It may be fleshy and green to start with. Some plants may still be flowering as seeds form elsewhere on the stem. If it is a fleshy fruit, then the trick is to harvest some before wildlife gets it all! Watch for birds and mammals visiting your plants, and if you start to see this, it’s a good sign the fruit is ripe for harvest. Other plants produce little fluffy parachutes to help their seeds disperse in the wind – for example, milkweeds, asters and goldenrods. Catching these seeds before the parachutes are fully formed, but the seeds are brown and ripe, can make collecting much easier. You’ll want to arm yourself with some small buckets, bags and a bit of space to capture and process the seeds you collect.

A Note on Ethical Seed Collecting
We recommend seed collecting from your own native plants at home. Remember that collecting seeds from other land requires landowner permission. It is good practice to collect only up to 10 % of a seed crop in a given year. Of course this is difficult to gauge, but make sure you leave fruits and seeds for wildlife to eat and store for winter, and to germinate to replenish the patch of plants themselves. Collecting from rare and endangered species may require permits, or be prohibited entirely. Make sure you are confident in plant identification, in order to avoid accidentally propagating a non-native or invasive species.
Seed Storage
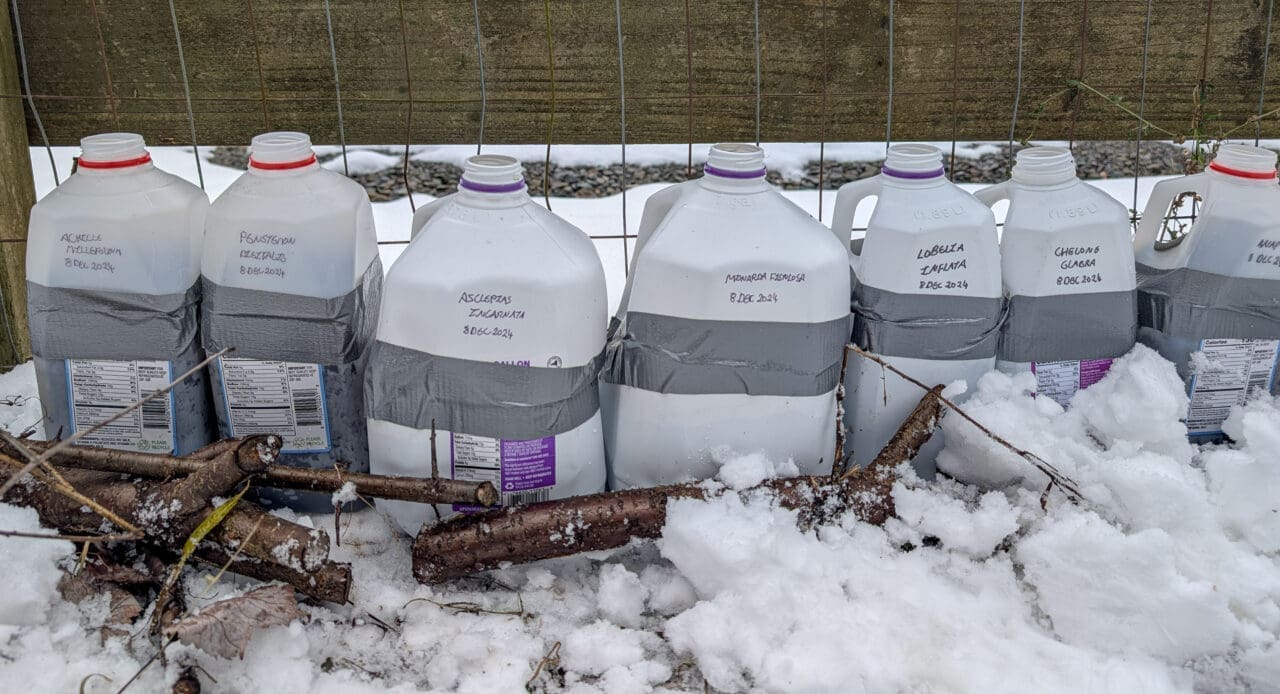
If you aren’t able to sow (plant) your seeds right away, then you will need to store them. Some species are more sensitive than others: some can survive for many years in storage while some need to be planted as soon as possible – even in the fall. Wet seeds may become mouldy, which can kill them, so removing excess material which can hold moisture is important. For fleshy fruit, remove as much of the fruit as possible using a blender or similar (see “Seed Collecting and Processing” below), rinse the seeds and lay them out to dry. Complete desiccation can also be harmful for some seeds, so package them into paper bags or envelopes once they are dry to the touch. Store them somewhere out of reach of animals – perhaps in a larger air-tight container, ideally somewhere with relatively stable temperatures and humidity. Don’t forget to label them! You may want to include the date and location you collected them, as well as the species. You don’t necessarily want to wait until spring to sow your seeds – see “Sowing the Seeds for Success” below for timing considerations.
Sowing the Seeds for Success
When you are ready to sow your seeds, think about what happens to a seed in nature. Is it a dry seed in a husk or capsule which stays on the plant stem all winter? Is it a berry that may get eaten by a bird or animal? This is important, because some seeds need to be put through the conditions they would be exposed to in the wild before they will germinate. A good example is our native orange Butterflyweed (Asclepias tuberosa) – the seeds need to be on cold, moist soil for a few weeks or months before they will germinate: they need to experience winter. This is called “stratification”. Some berry-producing plants need to be eaten and pass through a digestive tract before they will germinate. This is called “scarification”.

Seed Collection and Processing
But don’t despair – there are some tricks to reproducing these conditions at home! For seeds which need to experience winter, you can simply plant the seeds in soil in a pot or a tray and leave it outside in your garden or balcony. You may need to protect the seeds from being eaten with fine wire mesh, and make sure the soil doesn’t dry out in the spring. Make sure animals can’t become trapped in any protective measures you install. You can also use your fridge or freezer – plant the seeds in a tray of soil, and wrap it in a ziplock bag or similar to stop it from drying out, and leave it in the fridge or freezer for a few weeks. Don’t forget to label them so you know what species you have – remember your labels will have to survive cold and wet conditions for a while, so avoid inks which fade or wash off quickly.
Berries and Fruit
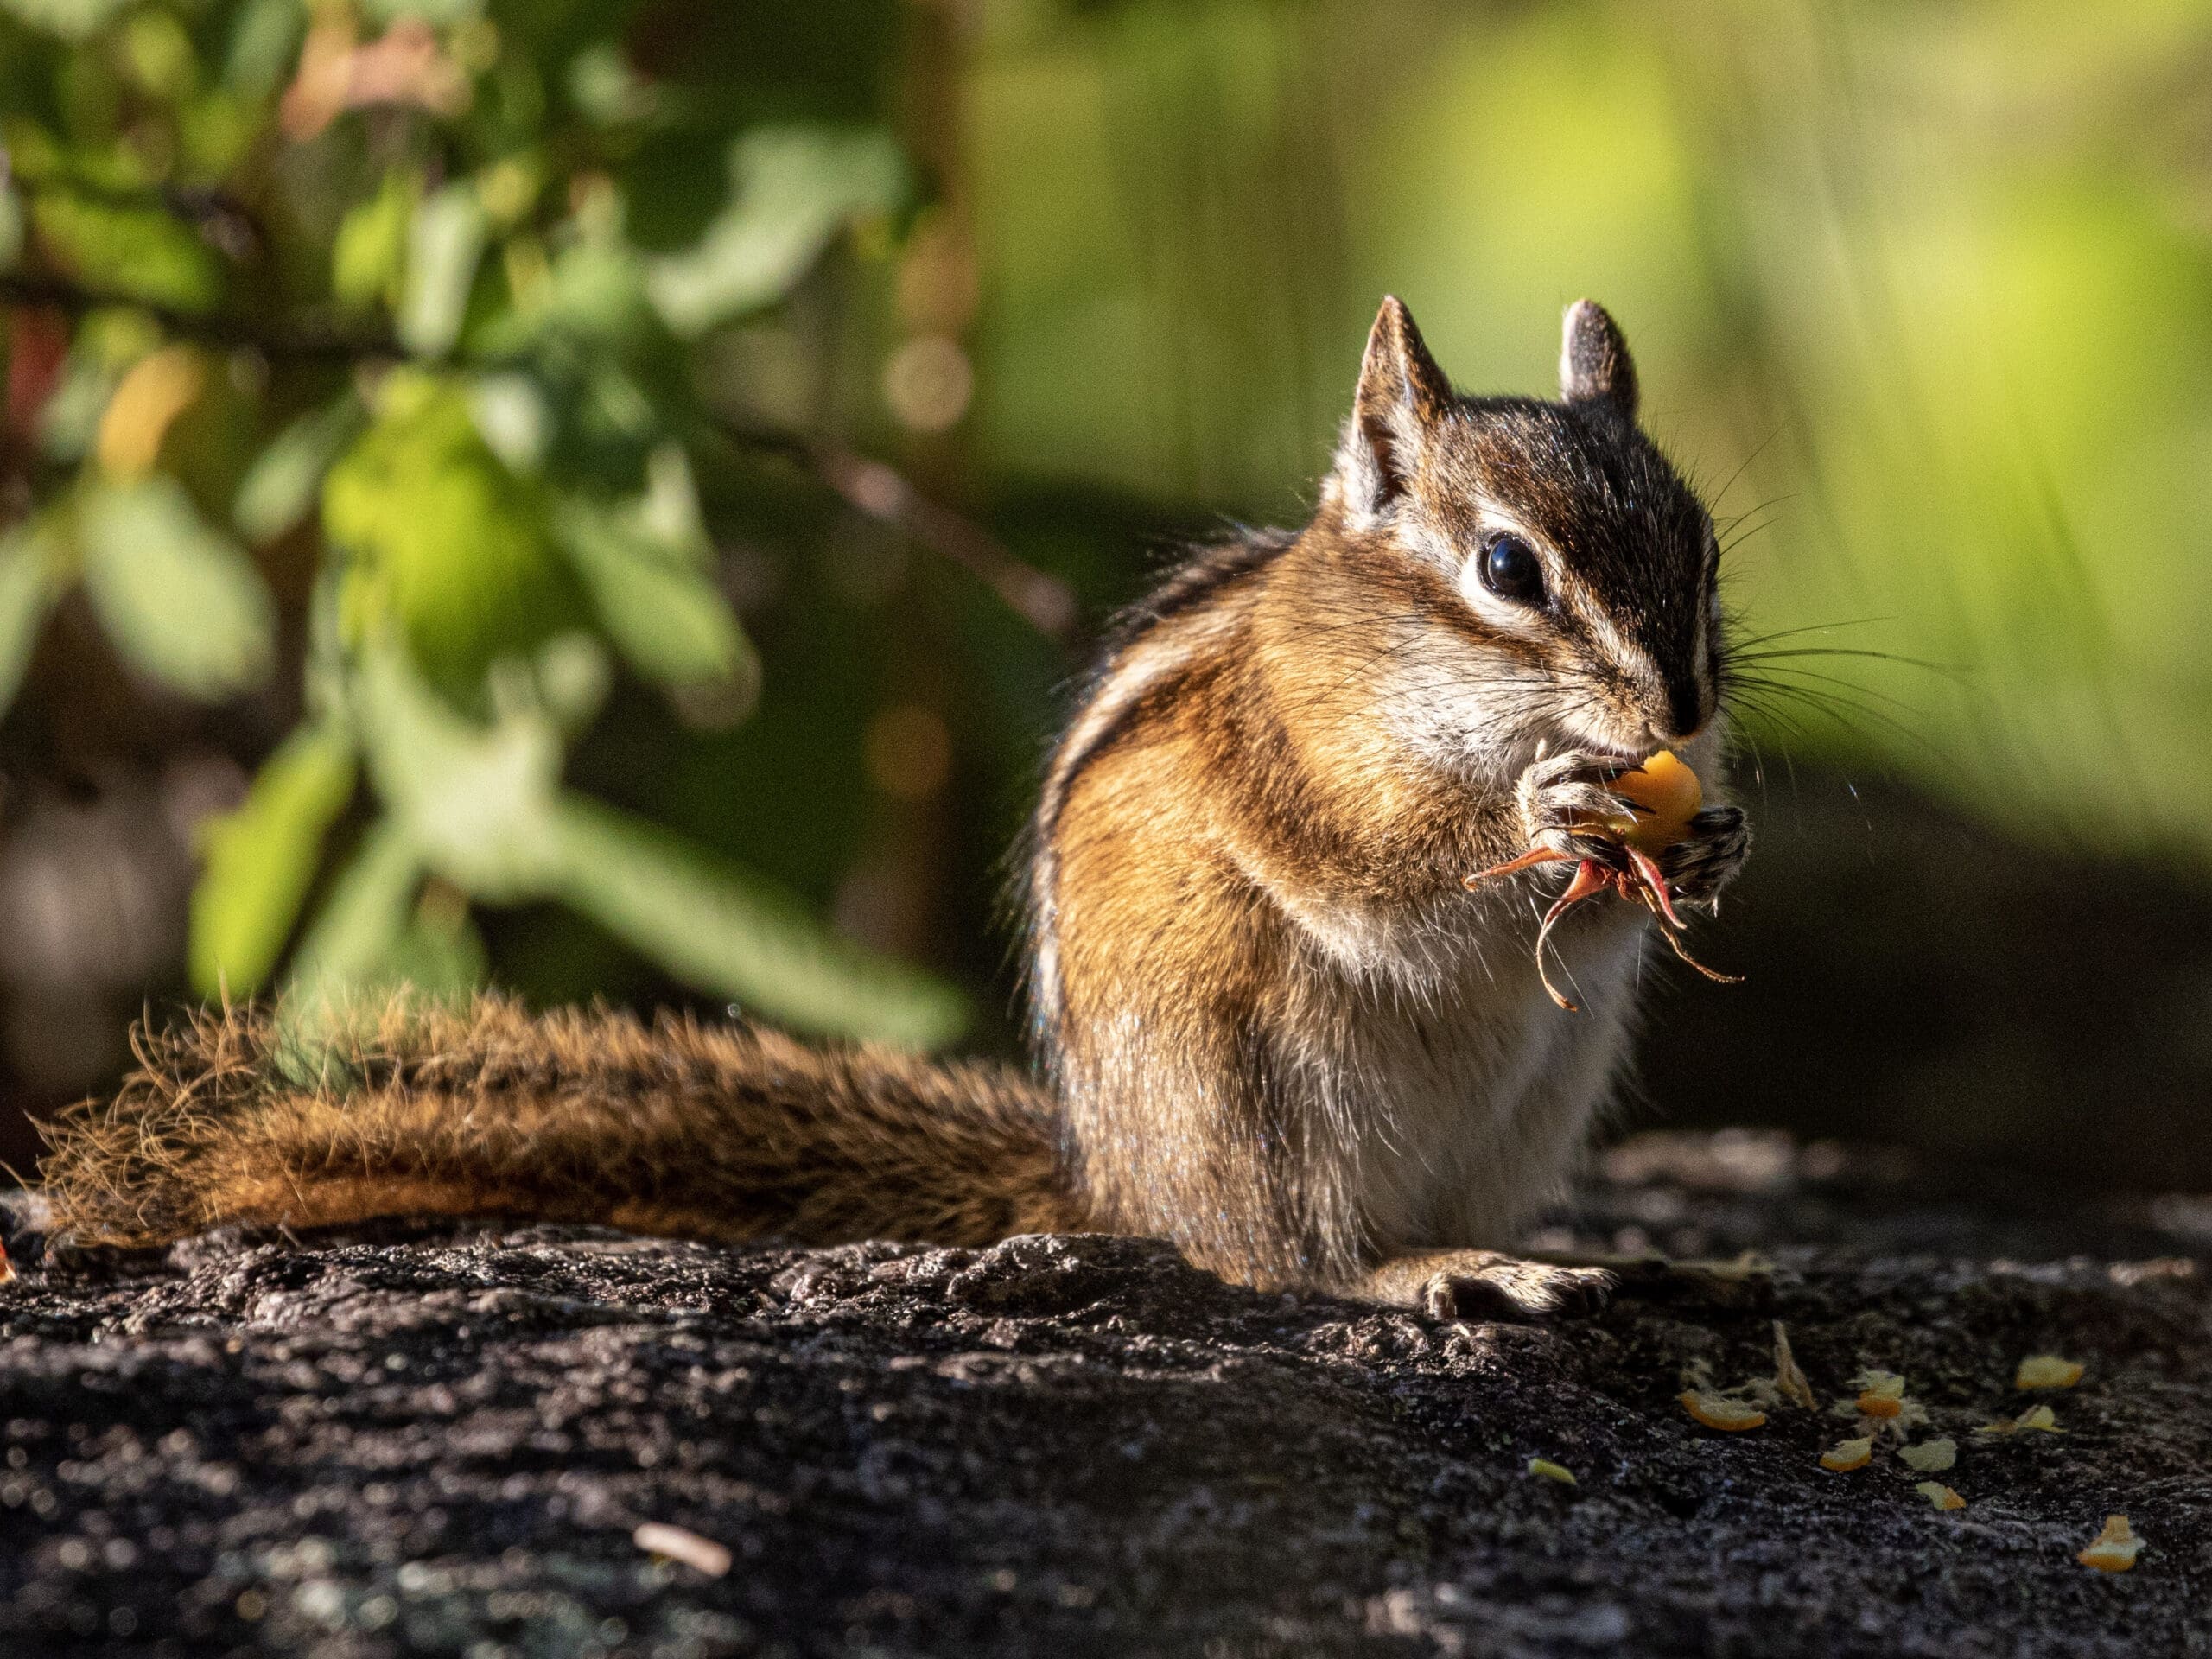
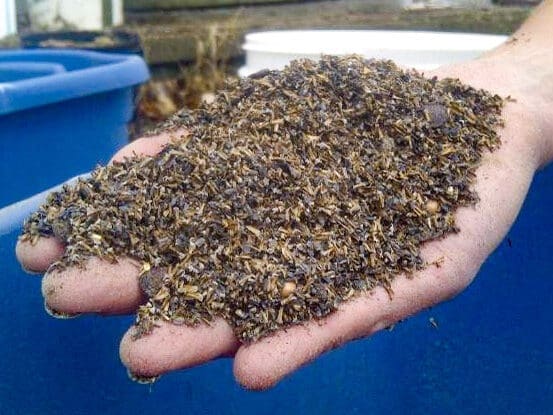
For berries, if you don’t have a trained berry-eating chipmunk to hand, you can use various techniques to remove the soft fruit. You can soak them and then use a potato masher or similar, or use a blender (gently, on a low setting, and in some cases you may need to wrap the sharp blades in tape so they don’t cut the seeds). You can then sieve out the seeds and plant them in soil, or dry for storage. Some plants are toxic or at least irritating to humans, so consider dedicating a blender and utensils to your seed processing activities. Some seeds which are adapted to passing through a digestive tract may also require roughening with sandpaper – this is known as scarification and mimics the damage done by digestive substances in the gut.
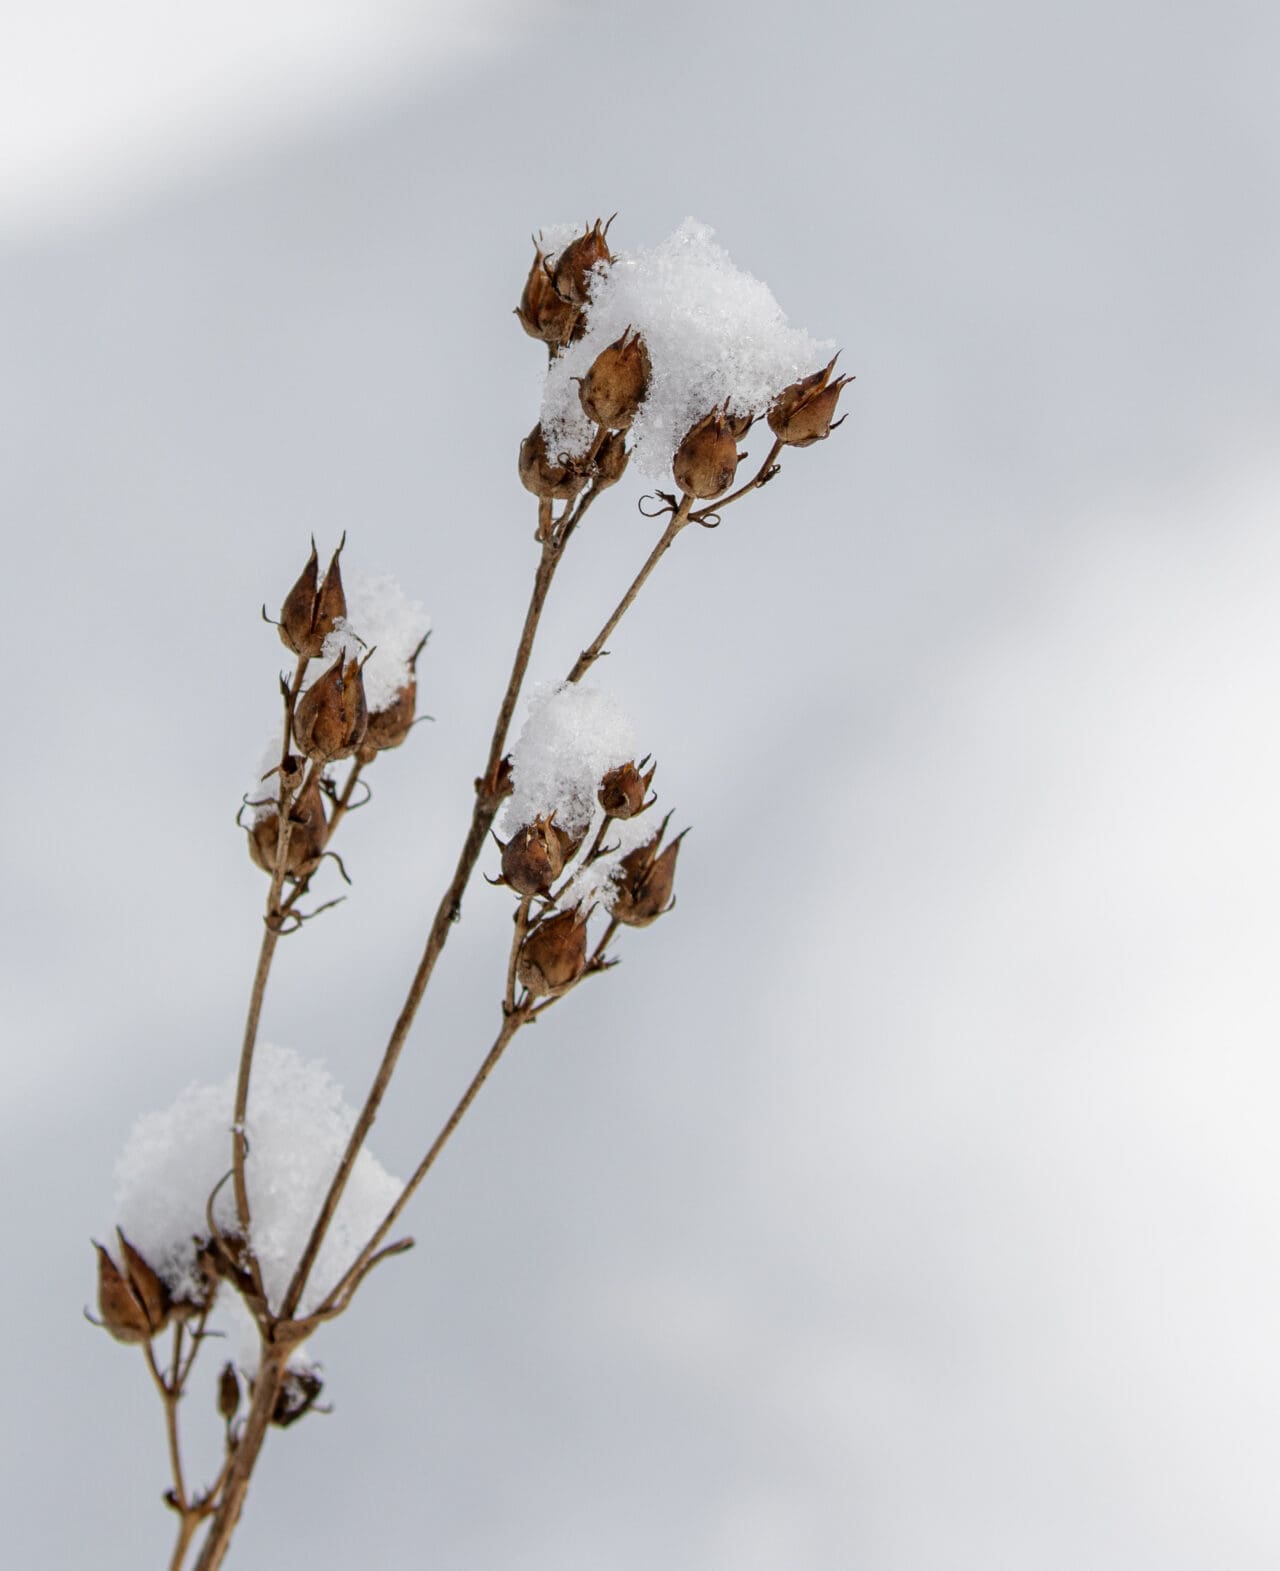
Dry Seeds
Many plants produce seeds housed in capsules or pods. When the seeds are ripe, these “containers” often turn brownish and dry out, releasing the seeds. Species like this can be easier to collect and process than fruit-bearing species, but you may still want to use a variety of sieving techniques to separate seed from debris.
Planting the Seed
Direct Sowing
When you are ready to plant your seeds, you have a few options. In nature, seeds fall to the ground via wind or animal dispersal, so if you have a bare patch of soil, you can simply scatter the seeds. This is called “direct sowing”. It can help to use a rake or similar to loosen the soil a little first, and again to spread the seeds around and improve their contact with the soil. If you have a lot of ground to cover and few seeds, add a “thinner” like sand or bran to help you get even coverage. You could add a thin layer of leaf litter to help maintain moisture, and to make the seeds slightly more difficult to find by birds and animals. This is an easy approach, but you will need to be prepared to distinguish any aggressive “weeds” from your desired native plant seedlings.
Bringing them on

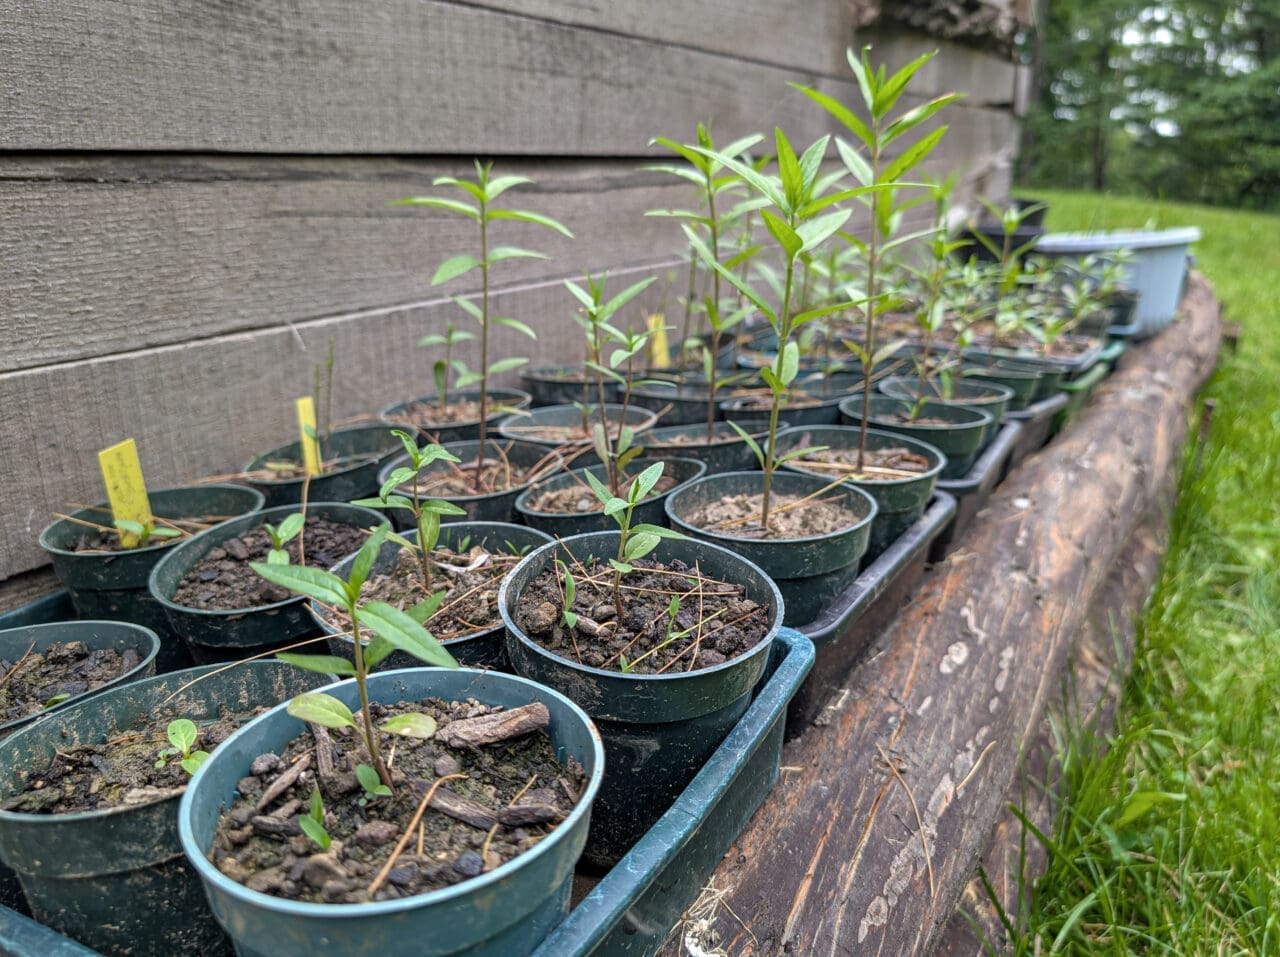
You can also plant seeds in trays or pots before later transplanting the plants to the garden. You can use commercial potting soils – these should be sterile and are helpful for eliminating weed competition. Alternatively, you can simply use soil from your garden – but you will need to be vigilant to “imposter” seeds germinating. Again, “think like your plant” – if it is native to rocky or sandy soil, use that to germinate and grow it; if it is a plant of rich, most forest soils, use that to germinate and grow your seeds. This is a good approach if you have a small number of seeds you want to keep track of, or don’t have the ground prepared yet.
Springing Spring – May Actually Be Summer
In spring, pay attention to your planted seeds. Especially in the north, some native plants won’t germinate until surprisingly late in the spring or early summer, even well after adult plants of the same species have emerged and grown. Keep the soil moist and look out for signs of germination in May and even into June and July, especially in the north. If you haven’t seen anything emerge by the end of summer, don’t give up – a few species even need two winters and a summer before they will germinate! The same can be true for other types of strong seasonal patterns – some species have evolved to avoid germinating in harsh dry, hot periods but may be stimulated to grow in cooler, moist conditions. Try to “think like a seed” and consider the typical seasonal rhythms of your area.

Germination! Transplanting Seedlings
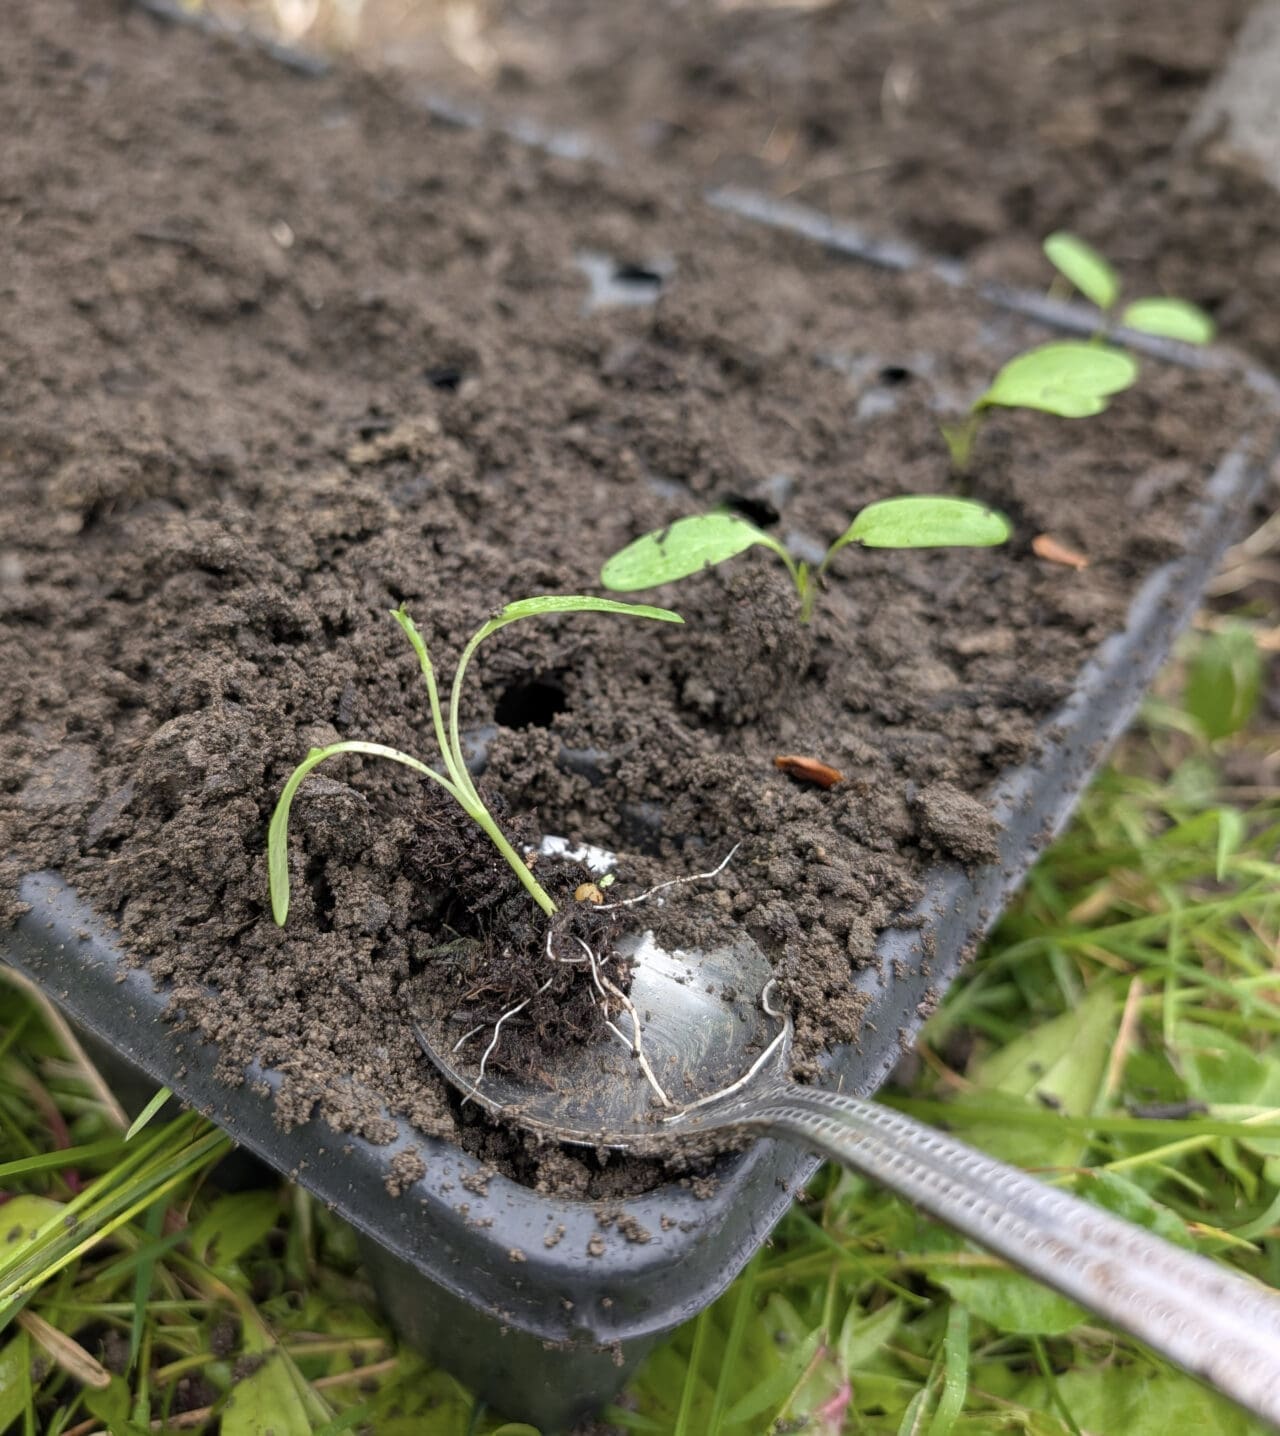
It is exciting when you start to see see seedlings emerge, but beware as this can also be the beginning of a stressful time – tiny plant seedlings can be quite sensitive to even brief shortages of water or other unsuitable conditions, so be vigilant. Give them time to fully emerge from the seed. If they are growing densely, you may want to transplant them to a large pot so they have more room to develop. Use a spoon or a similar light, fine implement to gently dig them up and plant them into their new home. Make sure you treat the roots very delicately, and ensure they are fully buried.
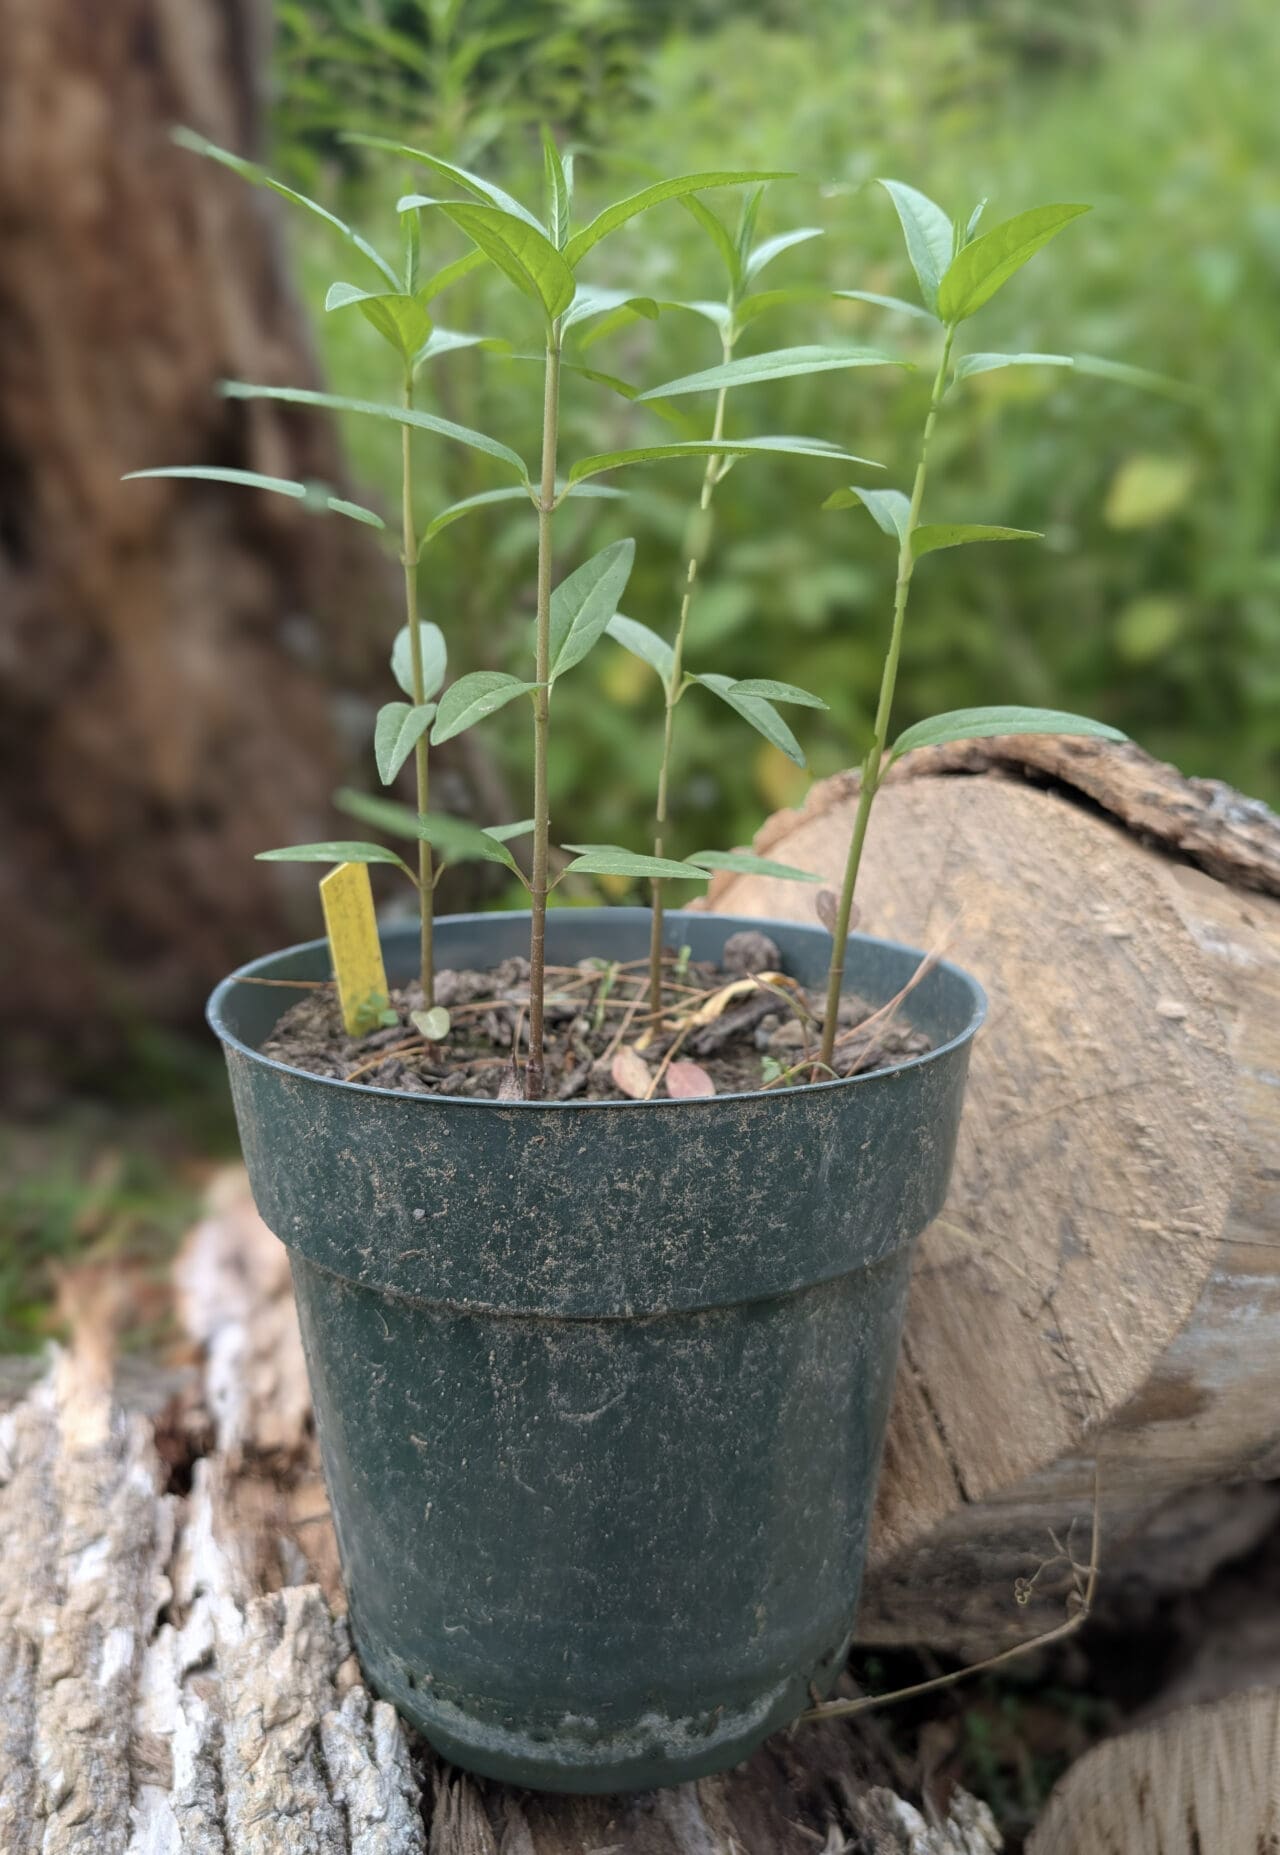
Growing the Seedlings up
Depending on where you want to add your new native plants, you may find it helpful to grow them up a bit in a controlled setting, for example in pots. This may make it easier for you to control competition from other plants, and damage from wildlife, and give them a bit of a head start. Even just a few weeks in a larger pot after germinating can let a plant grow big enough so it can withstand “the real world” of your garden. When you and your seedlings are ready, prepare a spot by removing any weeds, turning/loosening the soil a little and digging a hole which can accommodate your new seedling. Give it some extra care with watering and perhaps protection from herbivores until it gets itself established. Some young perennial plants may not flower in their first year, but they will invest in their root systems and with a bit of luck, should pop back up and flower in their second or third year.
Stay connected to the Great Backyard Bird Count.
By subscribing to stay connected to the Great Backyard Bird Count, you agree to receive communications from The Cornell Lab, Audubon, and Birds Canada. You may unsubscribe from any of the organizations' communications at any time.